How to Screen Record on iPhone: A Step-by-Step Guide with Tips for Seamless Recording
Introduction: Screen recording on an iPhone is a valuable feature that allows users to capture and share activities on their device. Whether you want to showcase a new app, create a tutorial, or simply save memorable moments, the iPhone’s built-in screen recording tool makes the process straightforward. In this guide, we’ll walk you through the steps of screen recording on your iPhone, along with some useful tips for a smooth recording experience.
Step 1: Open Control Center To initiate the screen recording process, open the Control Center on your iPhone. For iPhone X or later, swipe down from the upper-right corner of the screen. On iPhone 8 or earlier, swipe up from the bottom edge.
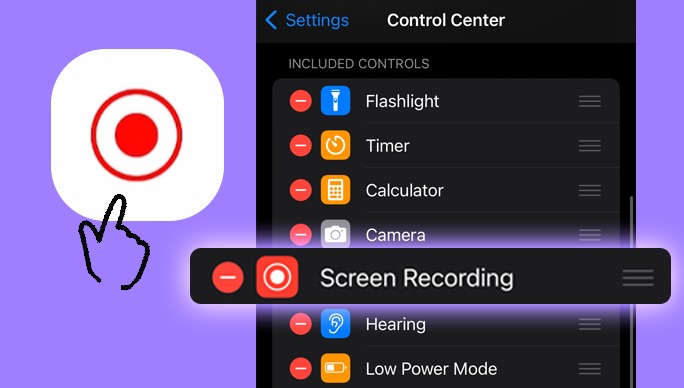
Step 2: Locate the Screen Recording Icon Look for the screen recording icon in the Control Center. It resembles a circle surrounded by another circle and is typically found among the control options.
Step 3: Start Recording Tap the screen recording icon. A countdown timer, usually set at 3 seconds, will begin, allowing you a moment to navigate to the specific screen or app you wish to record.
Step 4: Stop Recording To conclude the recording, tap the red recording indicator in the status bar at the top of your screen. Alternatively, reopen the Control Center and tap the screen recording icon again to stop the process.
Step 5: Access the Recording After stopping the recording, the video will be saved to your Photos app. Retrieve it from either the Camera Roll or the “Screen Recordings” album.
Tips for Successful Screen Recording: (How to Screen Record on iPhone)
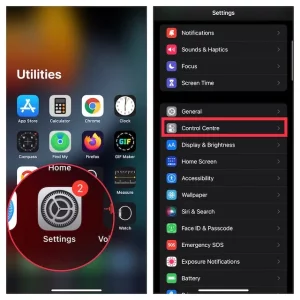
- Enable Screen Recording in Control Center Settings:
- Open the Settings app.
- Navigate to Control Center.
- Tap Customize Controls.
- Ensure “Screen Recording” is included in the active controls.
- Check App Restrictions:
- Some apps may have restrictions that prevent screen recording. Ensure the app you want to record allows this feature.
- Optimize Storage:
- Screen recordings can consume storage space. Regularly transfer or delete recordings to free up space on your device.
- Capture System Sounds:
- If you want to record system sounds, ensure that your iPhone’s ringer/silent switch is not set to silent.
- Edit Recordings:
- Basic video editing tools are available within the Photos app. Trim, cut, or add elements to enhance your recordings.
Conclusion: Screen recording on your iPhone is a versatile tool that opens up numerous possibilities for content creation and sharing. By following these simple steps and keeping the provided tips in mind, you can make the most of this feature and effortlessly capture and share your iPhone screen activities.